Imagine this: you’ve got a brand new sound system ready to take your music, movies, or events to the next level. You’re excited to feel the bass thumping and the crisp vocals filling the air. But before you start cranking up the volume, you need to install your sound system properly. Don’t worry; we’re here to guide you through the process with some simple tips and tricks.
Step 1: Choose the Right Location
The first thing you need to consider is where to place your speakers. The location can make a big difference in how your sound system performs. Here are some things to keep in mind:
- Room Acoustics: Different rooms have different acoustics. If you’re setting up in a small, carpeted room, the sound will be different from a large, open space with hardwood floors. Be aware of how the room affects sound.
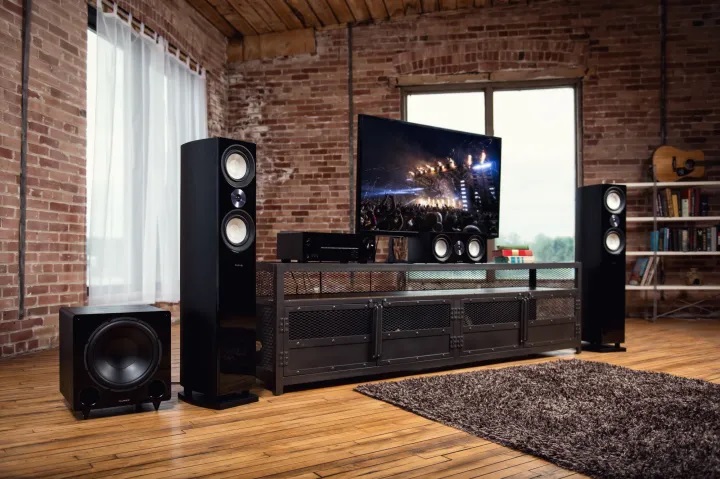
- Speaker Placement: For a stereo setup, try to place your speakers at ear level, slightly angled towards your listening area. This helps create an immersive sound experience.
- Subwoofer Placement: If you have a subwoofer, experiment with its placement. Subwoofers are often best placed near a wall or corner to maximize bass output.
Step 2: Connect Your Gear
Now that your speakers are in the right place, it’s time to connect your equipment. Here’s what you’ll need to do:
- Check Your Cables: Make sure you have the right cables for your setup. For most home setups, you’ll need speaker cables, and for more complex systems, you might need audio cables like RCA or HDMI.
- Speaker Wire Length: Measure the distance from your amplifier or receiver to your speakers and make sure your speaker wires are long enough. You can always trim them if they’re too long.
- Color Coding: Many speaker wires come with color-coding, like red for the right speaker and black for the left. This can make it easier to connect everything correctly.
Step 3: Calibrate Your System
Calibrating your sound system ensures that all your speakers are working together harmoniously. Most modern amplifiers and receivers have built-in calibration systems, making this step a breeze.
- Use Auto Calibration: Follow your equipment’s instructions for automatic calibration. This usually involves using a microphone to analyze your room’s acoustics and adjusting speaker levels accordingly.
- Manual Calibration: If you don’t have an automatic calibration feature, you can manually adjust speaker levels using a sound level meter. This takes a bit more time and patience but can yield excellent results.
Step 4: Test Your System
Before you dive into your favorite playlist, take a moment to test your system. Play some music or a movie and listen carefully. Make adjustments if needed:
- Balance: Ensure that the sound is balanced between all your speakers. No speaker should be too loud or too quiet.
- Bass and Treble: Adjust the bass and treble settings to your liking. Most amplifiers or receivers have these controls to fine-tune your sound.
Step 5: Hide Those Wires
Wires can be unsightly and, if not managed properly, a tripping hazard. Here’s how to deal with them:
- Use Cable Management: Invest in cable management solutions like cable clips, conduits, or raceways to keep your wires neat and organized.
- Tuck Them Away: Whenever possible, tuck wires along the baseboards or behind furniture to keep them out of sight.
- Labeling: Label your cables at both ends, so you know which cable goes where. This will save you a lot of frustration if you ever need to make changes.
Step 6: Don’t Forget the Power Surge
Protecting your equipment from power surges is essential. A sudden surge in electricity can damage your sound system. Here’s what to do:
- Use Surge Protectors: Plug your amplifier, receiver, and other gear into surge protectors or uninterruptible power supplies (UPS) to safeguard them from power spikes.
Step 7: Enjoy Your Sound System
With your sound system properly installed and calibrated, it’s time to sit back, relax, and enjoy the audio experience you’ve created. Whether you’re watching a movie, listening to music, or hosting a party, your well-installed sound system will provide you with top-notch sound quality.
Additional Tips and Tricks
- Keep Your System Dust-Free: Dust can accumulate on speakers and affect sound quality. Regularly dust off your speakers and clean them gently with a soft, dry cloth.
- Speaker Isolation: To prevent unwanted vibrations, consider using isolation pads or stands for your speakers.
- Upgrading Your Cables: Higher-quality speaker cables can sometimes make a noticeable difference in sound quality, especially in advanced audio setups.
- Regular Maintenance: Periodically check your connections and cables to ensure everything remains secure. Loose connections can lead to sound issues.
In conclusion, installing a sound system doesn’t have to be a daunting task. By following these tips and tricks, you can set up your sound system with confidence. Remember that patience and attention to detail are key. With your sound system installed and optimized, you’re ready to immerse yourself in the world of audio and enjoy your favorite music, movies, and more like never before. So, go ahead, turn up the volume, and let the music play!